Sync your lessons with Google Calendar
Once Google Calendar is connected, Kadrella creates one calendar per tutor, named "Cours - First Last". Each lesson becomes an event with the students, tutor, place, time and status, and upcoming lessons are added as soon as you connect. The calendar is shared read-only with the tutor’s email and the managers’ emails: you then add it in Google Calendar. This integration is part of the Starter plan.
6 stepsStarter planScreenshots from 4 November 2026
Step 1
Open the Google Calendar integration
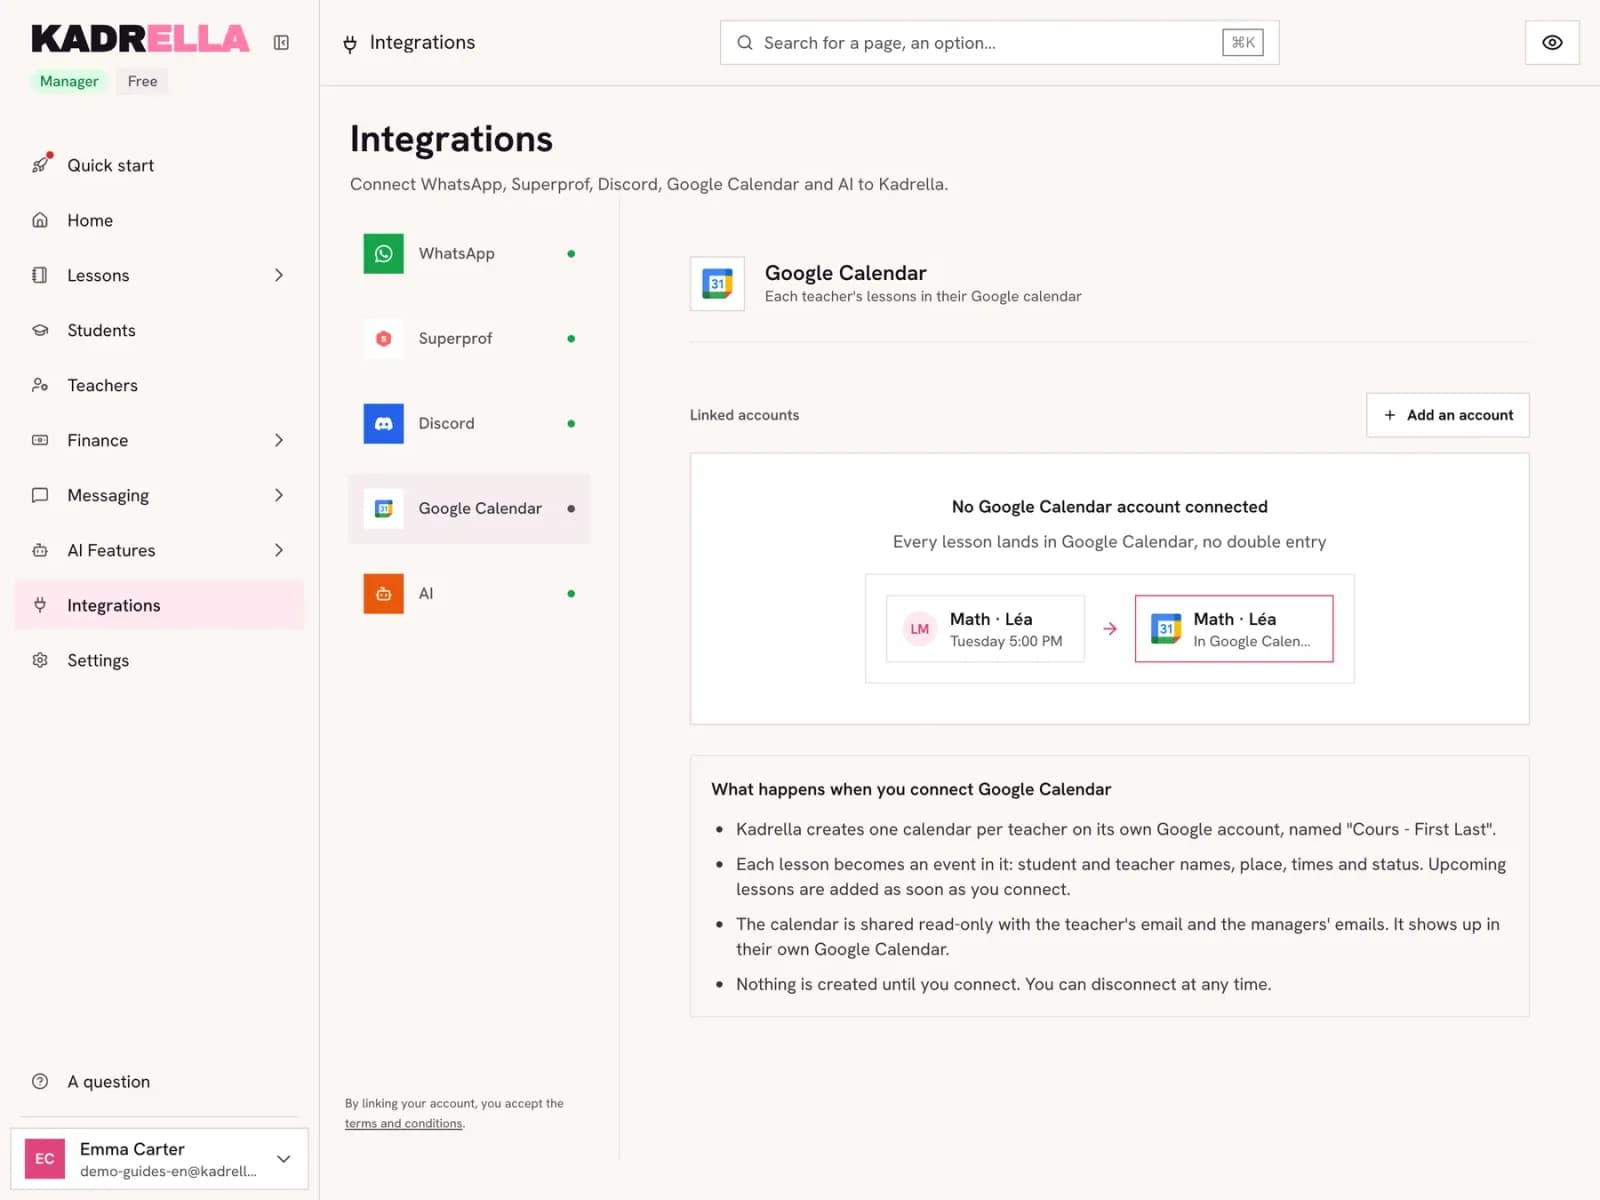
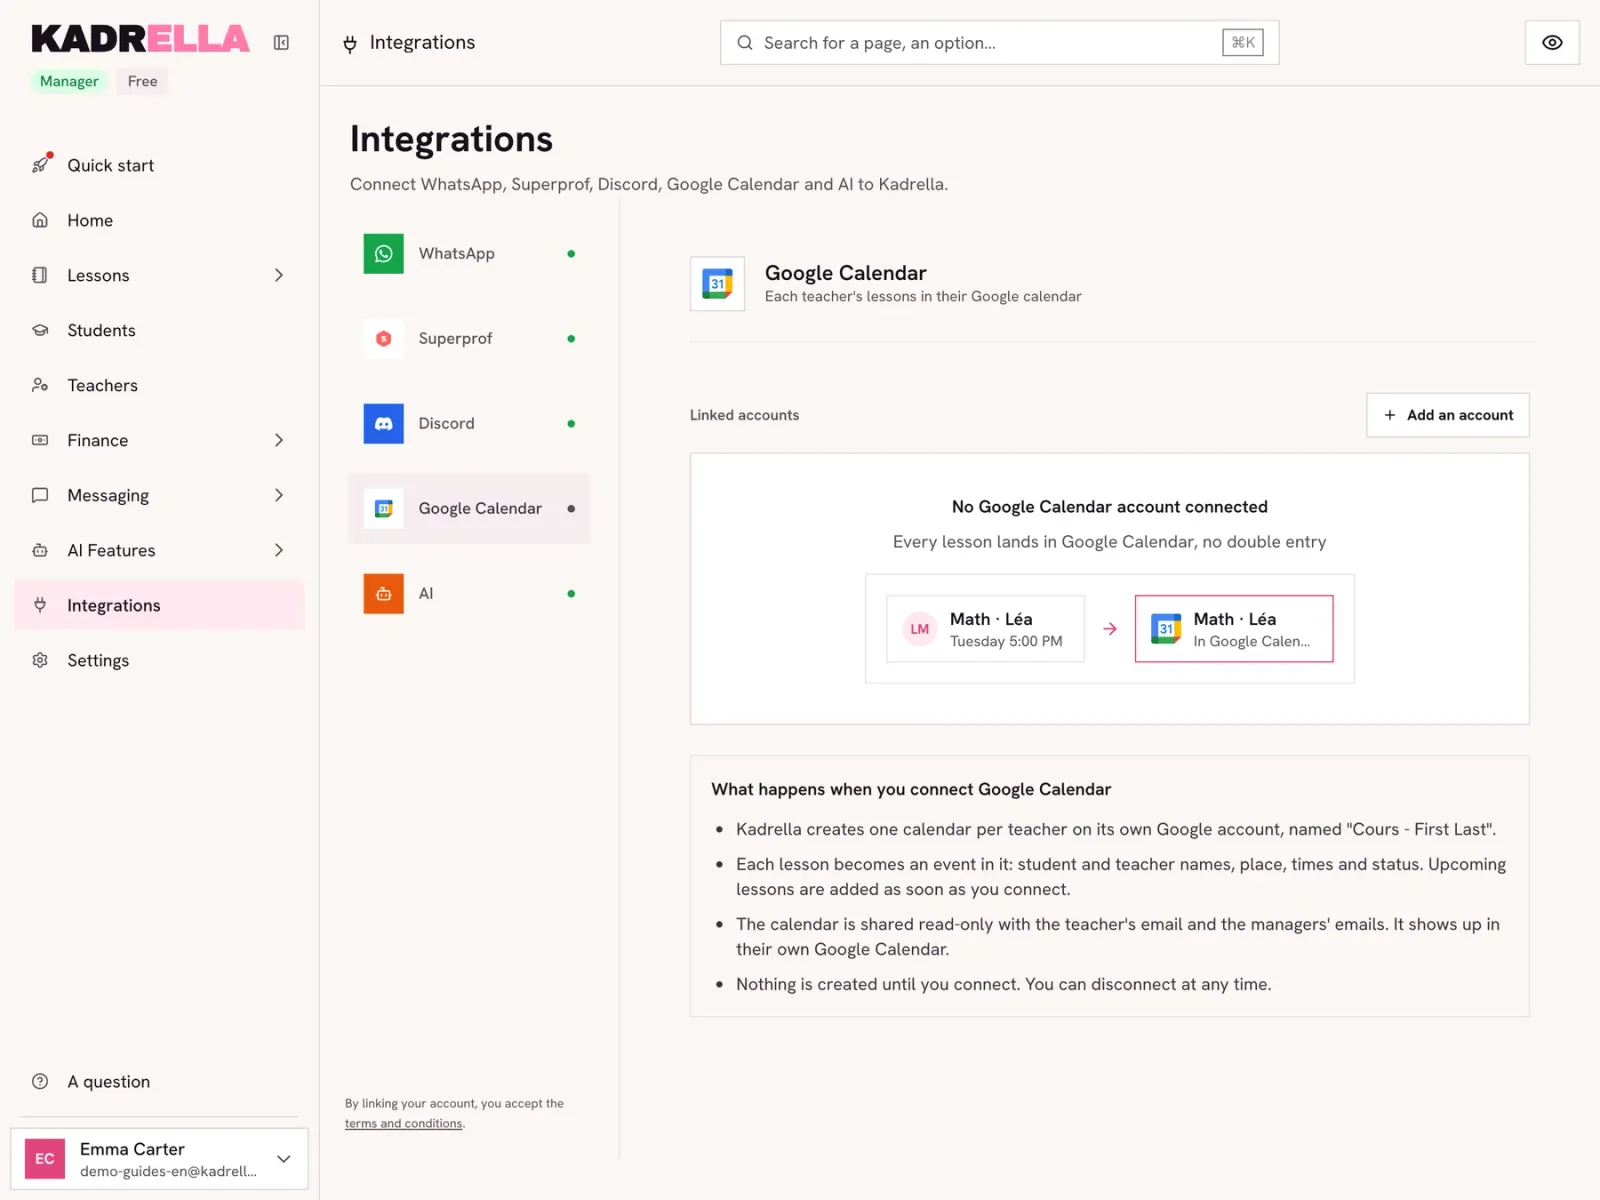
In "Integrations", choose "Google Calendar". The box at the bottom sums up what will be created. Click "Add an account".
 View the full-size screenshot
- The Google Calendar integration.
- "Add an account" opens the connection.
Step 2
Check what will be created and connect
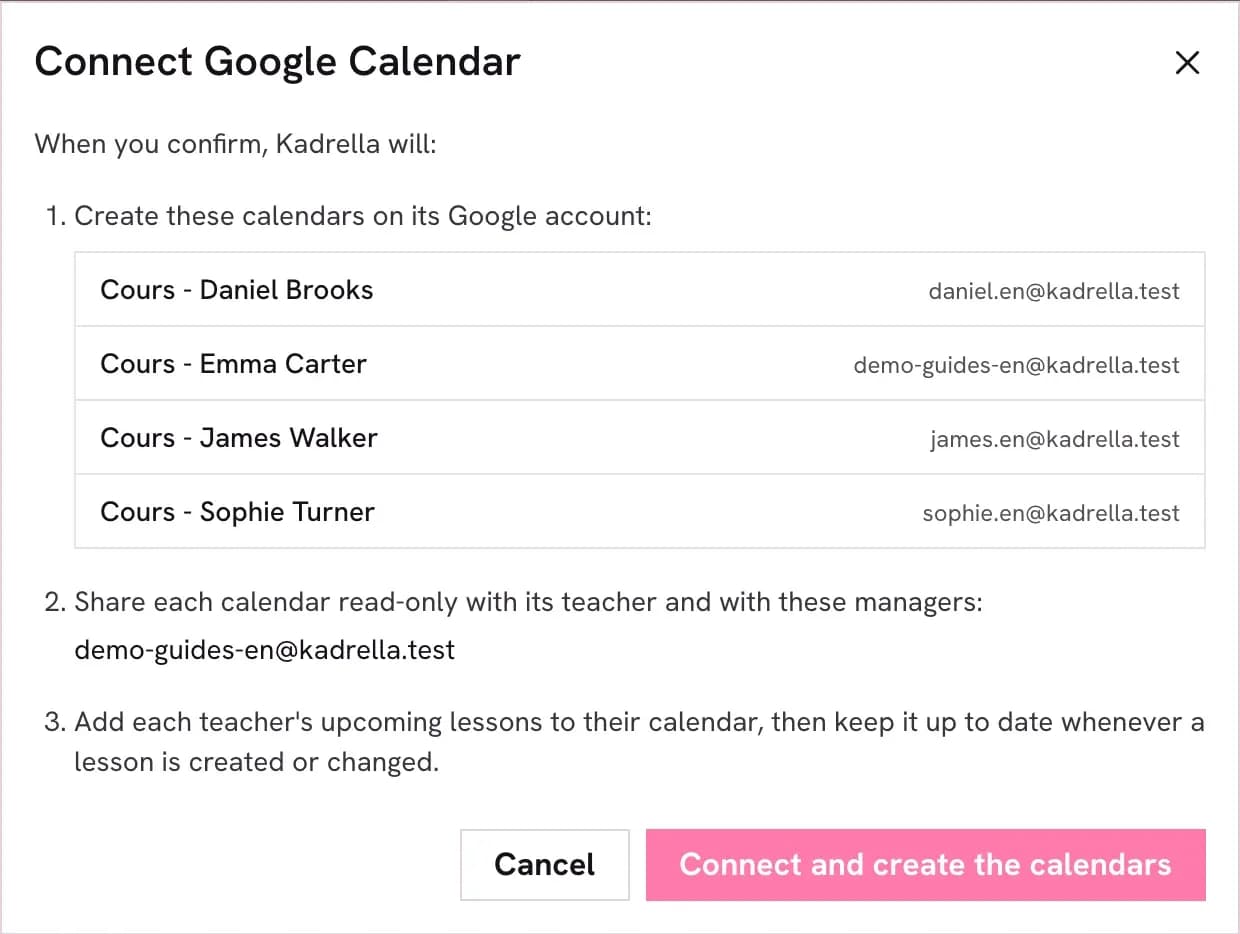
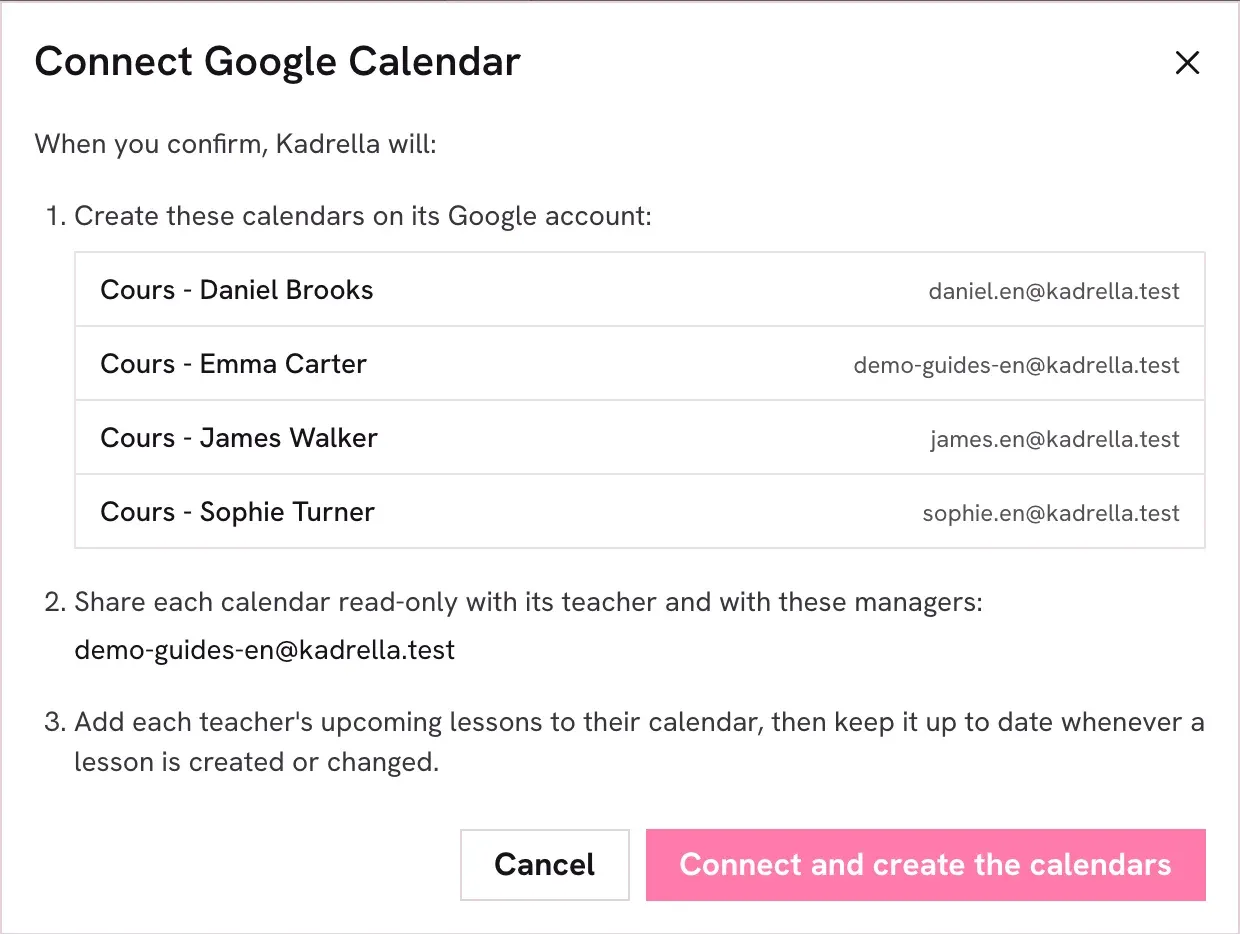
Kadrella lists the calendars it will create (one per tutor) and the managers they will be shared with. A tutor without an email will not get access to their calendar: add it on their record first. Click "Connect and create the calendars".
 View the full-size screenshot
- "Connect and create the calendars" starts the creation.
Step 3
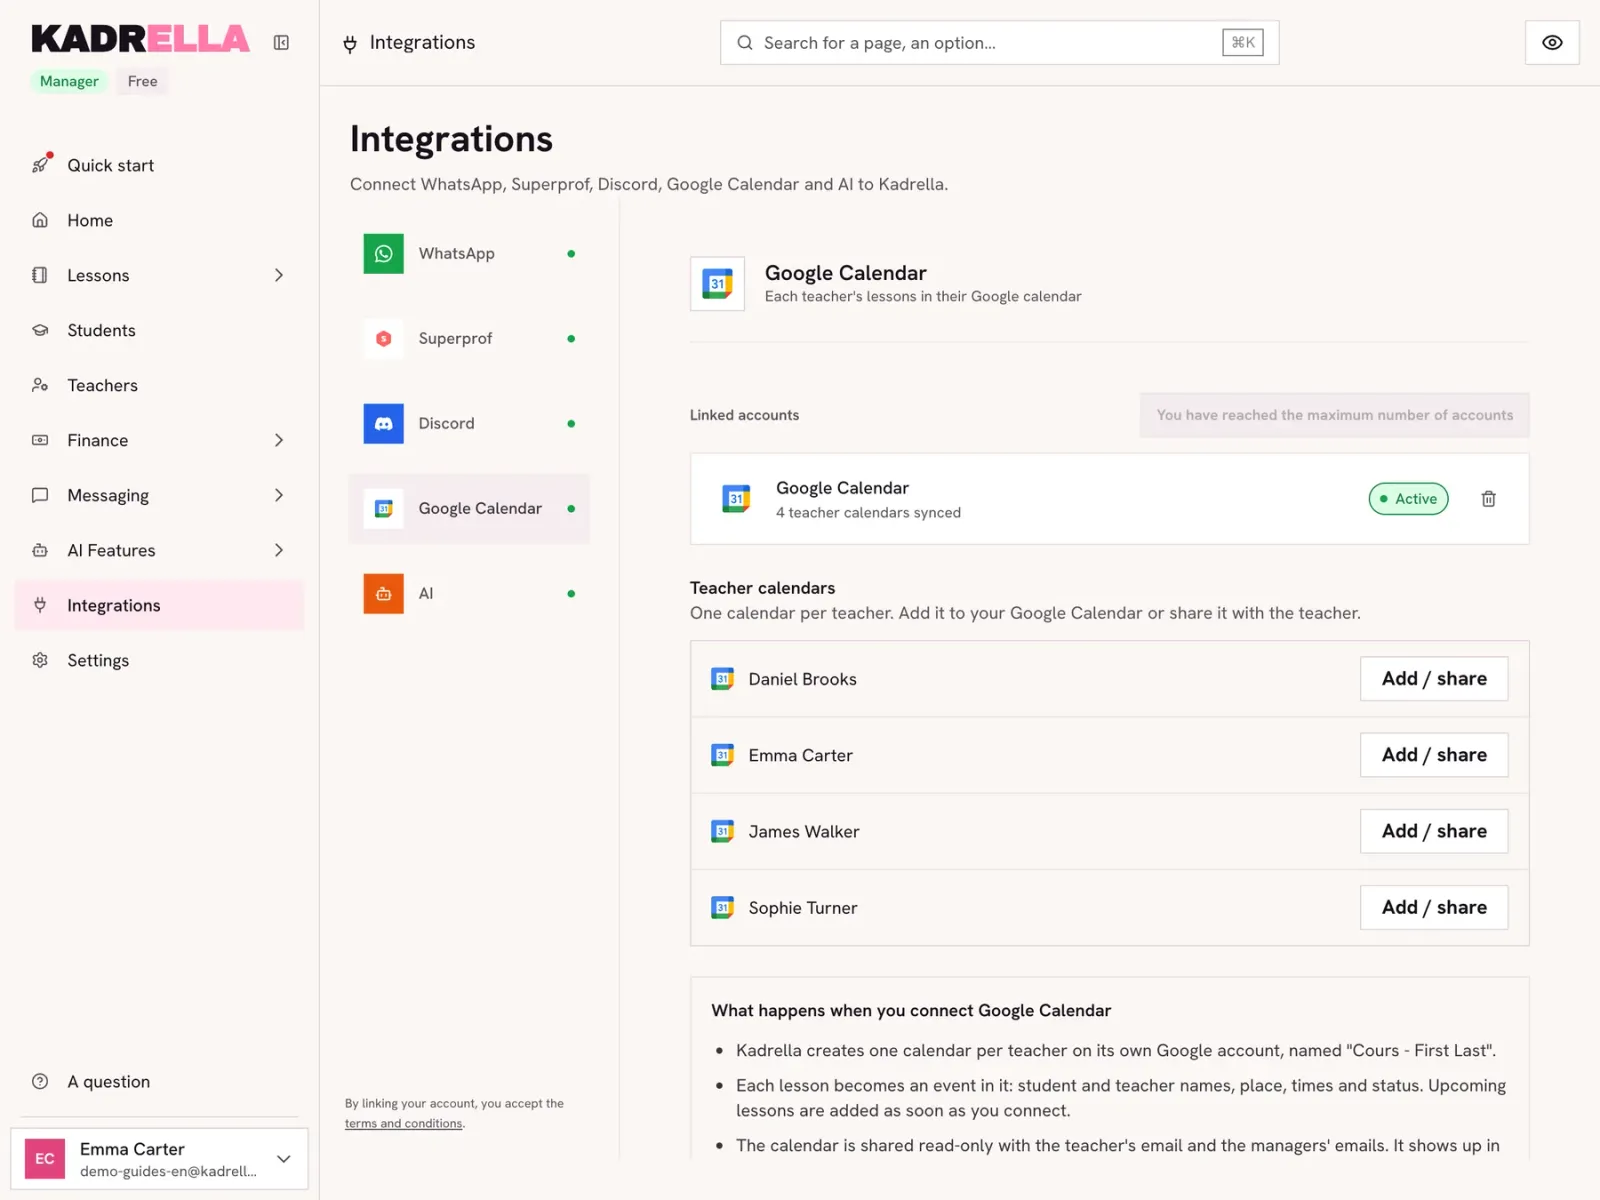
Find the tutors’ calendars
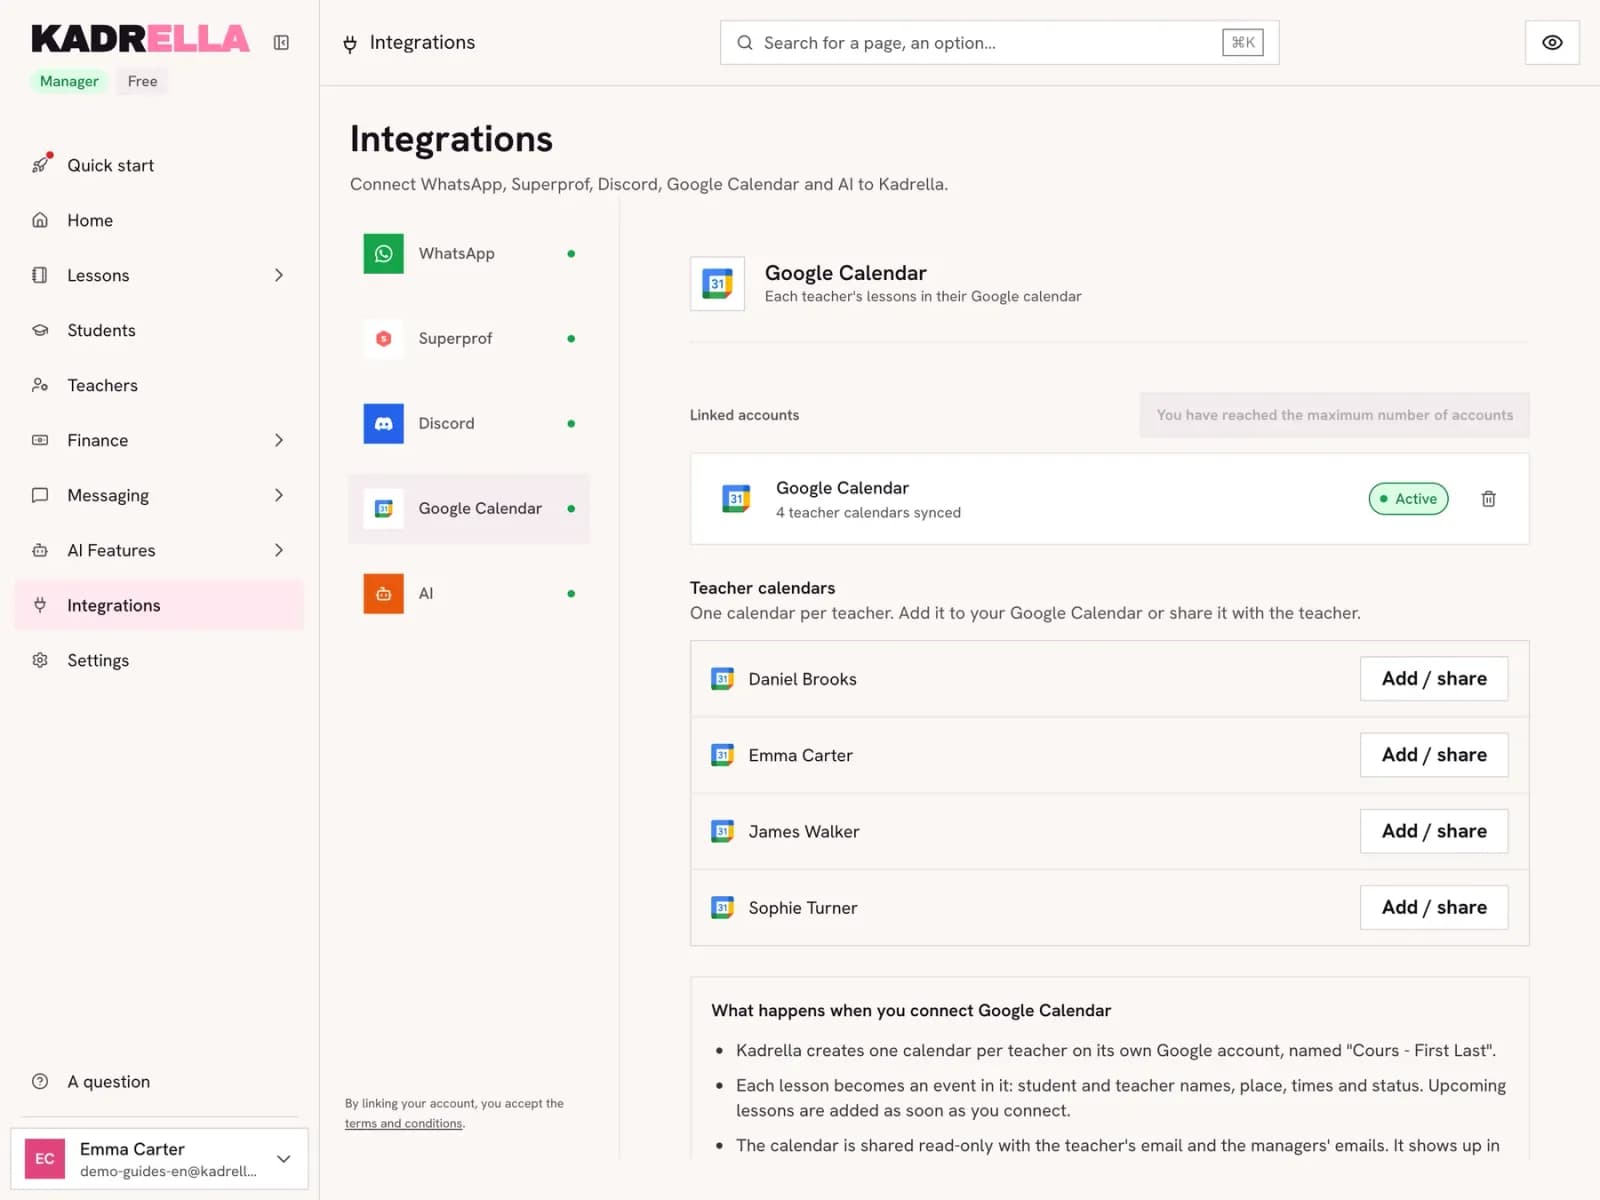
Once connected, "Teacher calendars" lists one calendar per tutor. "Add / share" opens a calendar’s details: its Google Calendar link and who it is shared with.
 View the full-size screenshot
- One calendar per tutor.
- "Add / share" to add or share it.
Step 4
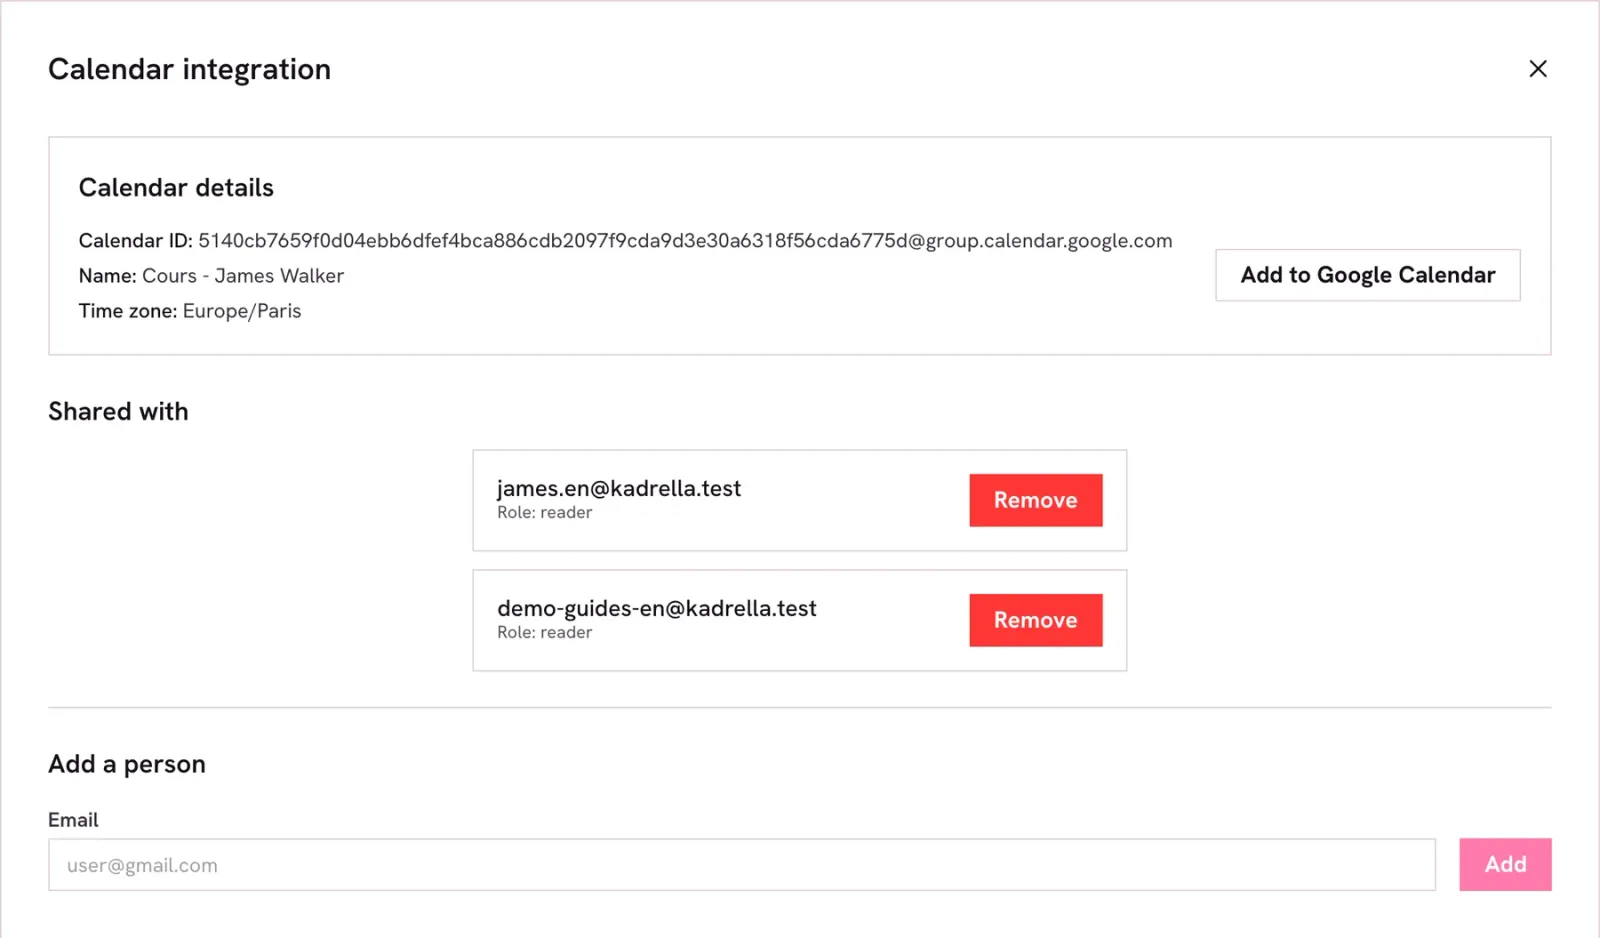
Add the calendar to Google Calendar
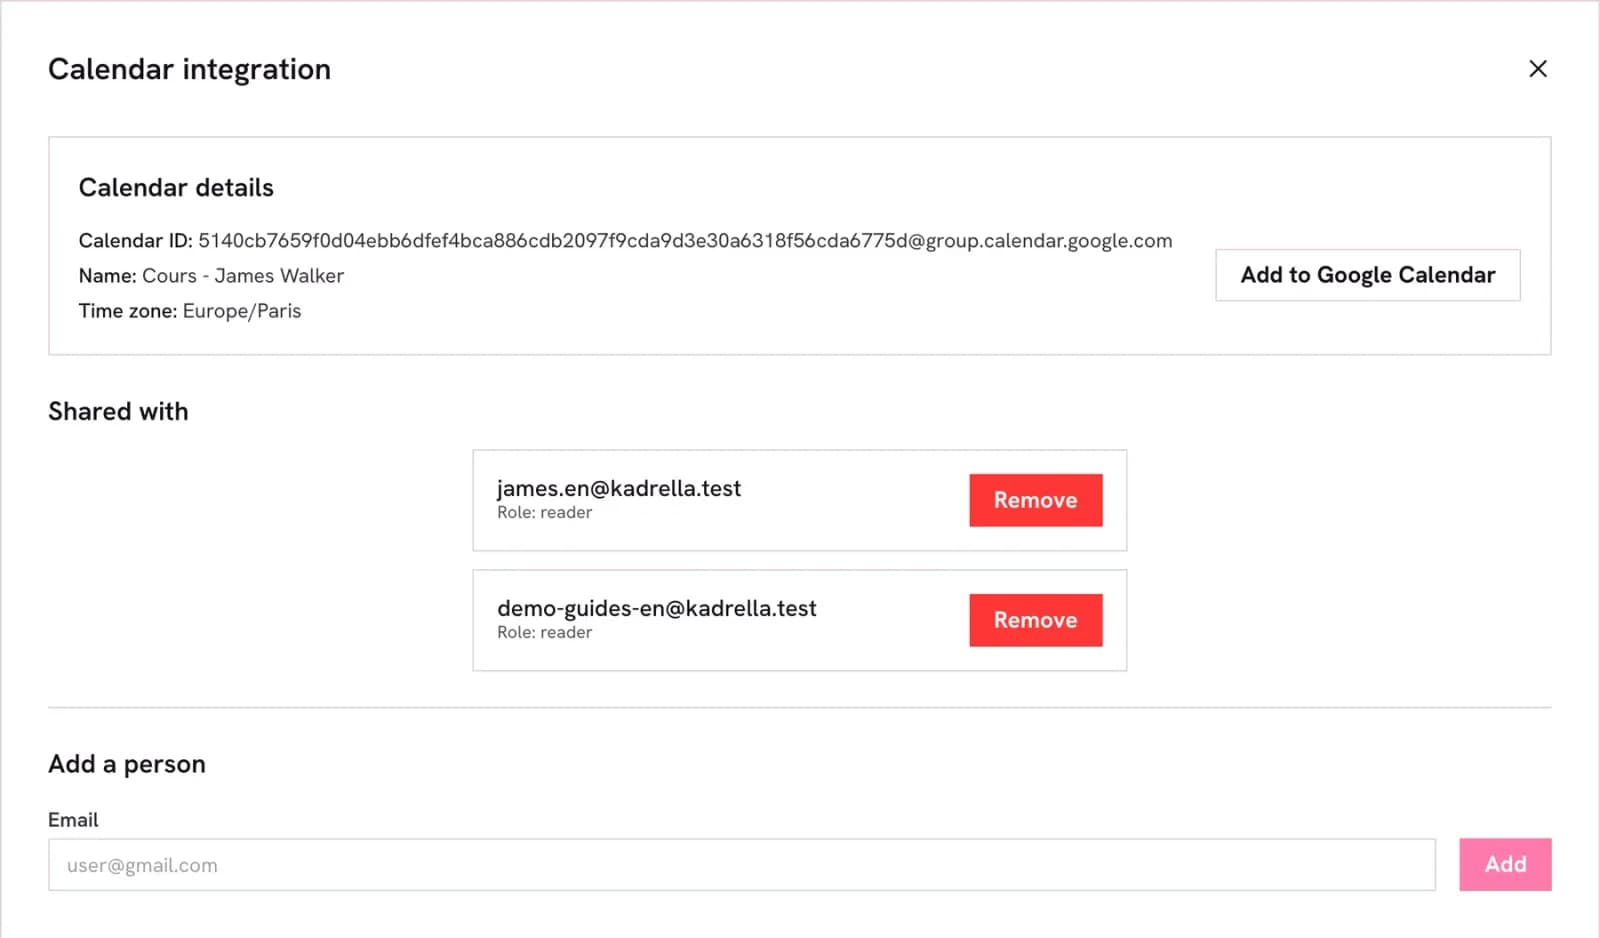
The "Add to Google Calendar" button opens Google Calendar with this calendar ready to add: sign in with an email listed under "Shared with" and confirm. "Add a person" shares the calendar with another email, such as an assistant.
 View the full-size screenshot
- "Add to Google Calendar" opens Google with this calendar.
- The emails that can see the calendar.
Good to know
- The calendar is shared with the tutor’s email: it also shows up by itself in their Google Calendar, under "Other calendars".
Step 5
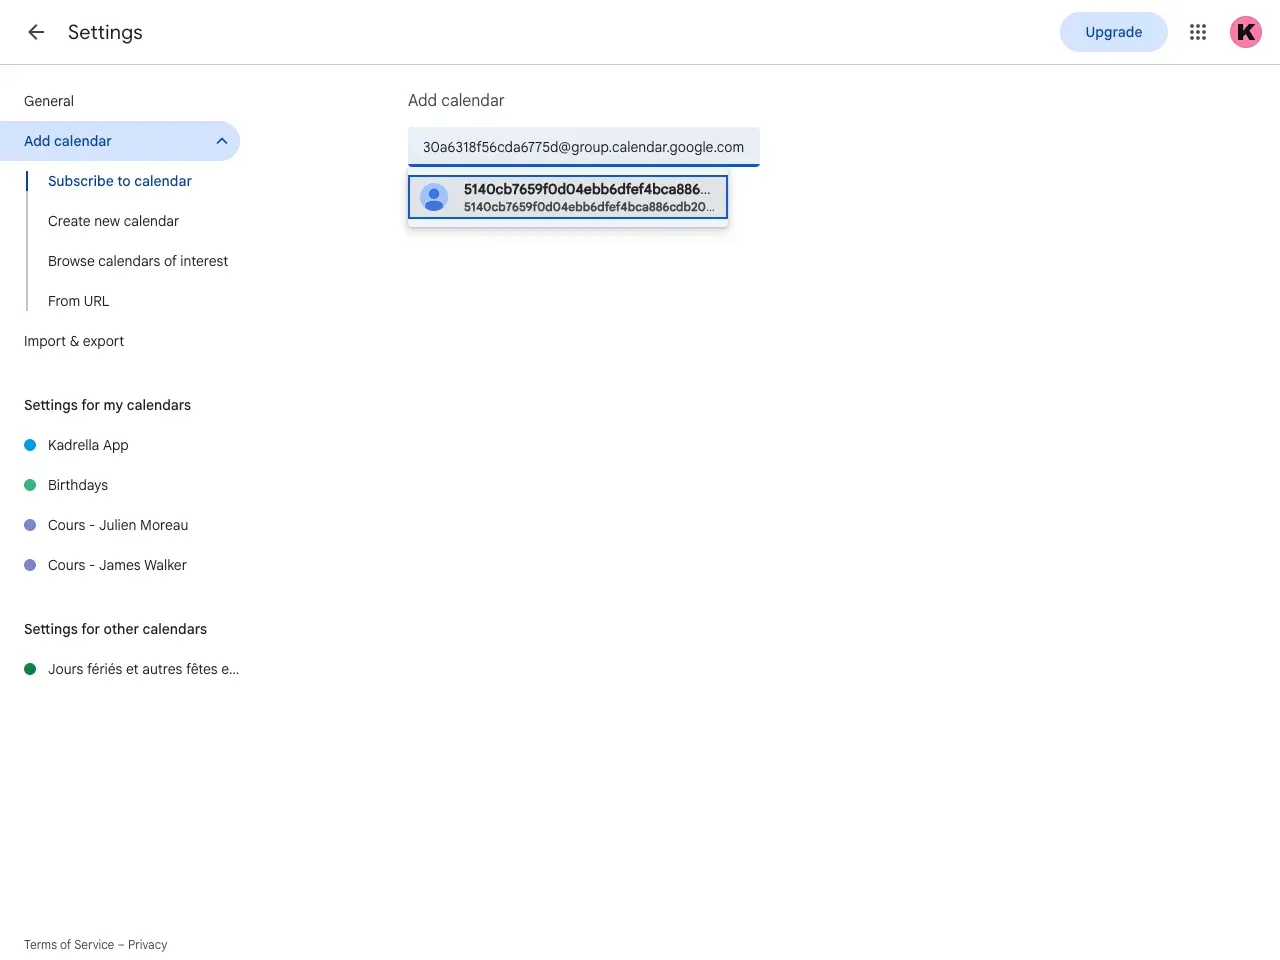
Otherwise: add it with its ID
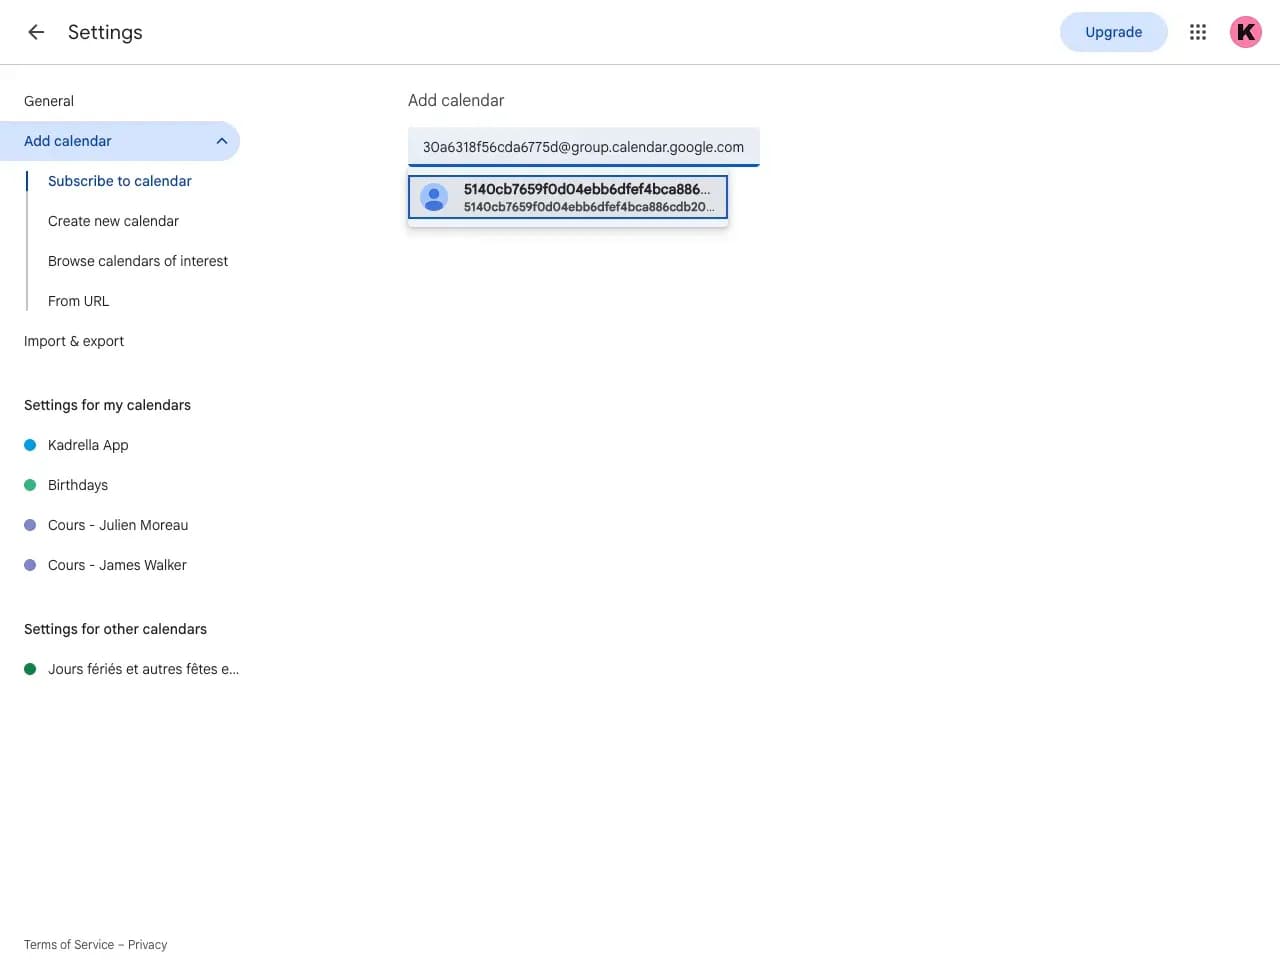
On calendar.google.com, next to "Other calendars" in the left column, click "+" then "Subscribe to calendar". Paste the calendar ID (shown in "Add / share", it ends with @group.calendar.google.com) and press Enter.
 View the full-size screenshot
- The Kadrella calendar ID, pasted here.
Step 6
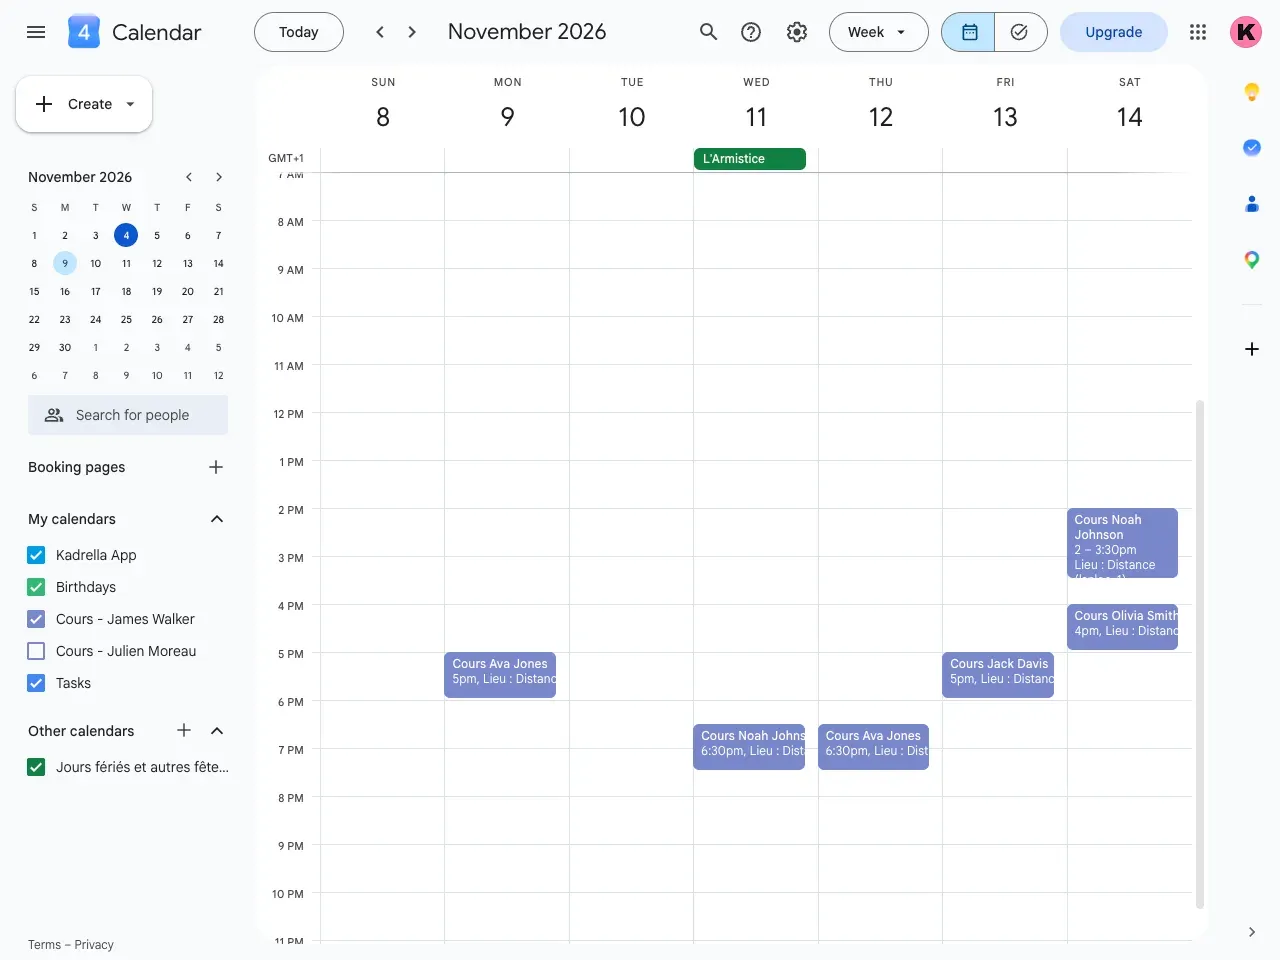
The lessons in Google Calendar
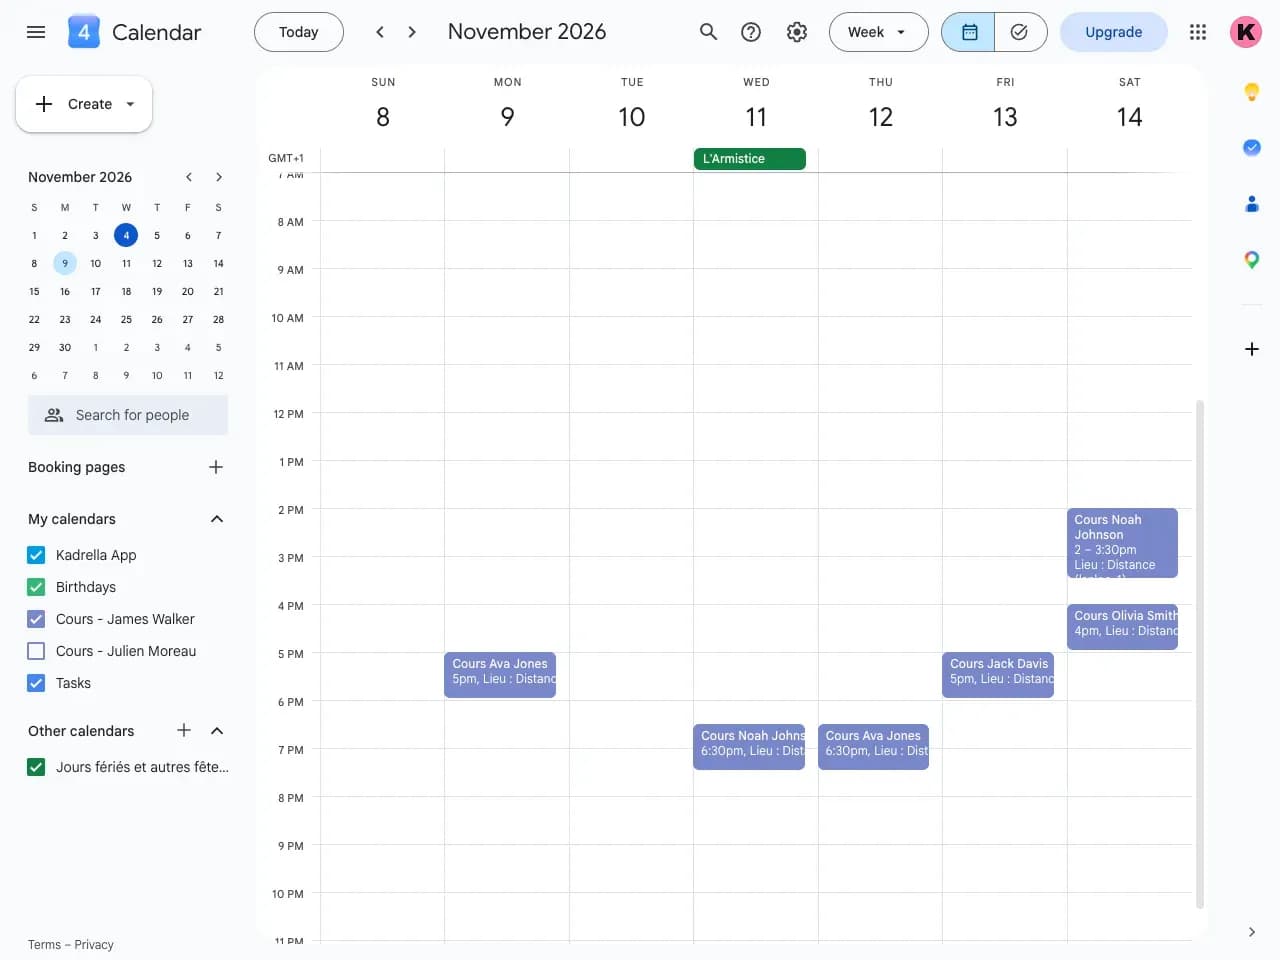
The "Cours - First Last" calendar shows in the left list, with one event per lesson. You can change its colour or hide it, but lessons are edited in Kadrella: each lesson created, moved or cancelled is updated there.
 View the full-size screenshot
- The tutor’s calendar in the list.
- A lesson, created by Kadrella.
Good to know
- For a recurring series, only the lessons already created (the next 4 weeks) are in the calendar. The next ones arrive over time.
- When you disconnect, you choose to keep the calendars (upcoming lessons are removed from them) or delete them from Google Calendar.
Going further
- Feature
- Google Calendar sync
- Related reading
Screenshots taken on a demo account: names, phone numbers and amounts are made up.
Spend your Sundays teaching, not chasing payments.
Free to start, set up in minutes. No card.